
Home Remedy for Cleaning Dentures: A Safe, Simple Guide
You notice a dull stain, a rough patch, or an odor that rinsing does not fix. Then you search for a home remedy for cleaning dentures and find conflicting advice.…
You notice a dull stain, a rough patch, or an odor that rinsing does not fix. Then you search for a home remedy for cleaning dentures and find conflicting advice. One page suggests vinegar. Another recommends baking soda, peroxide, or bleach.
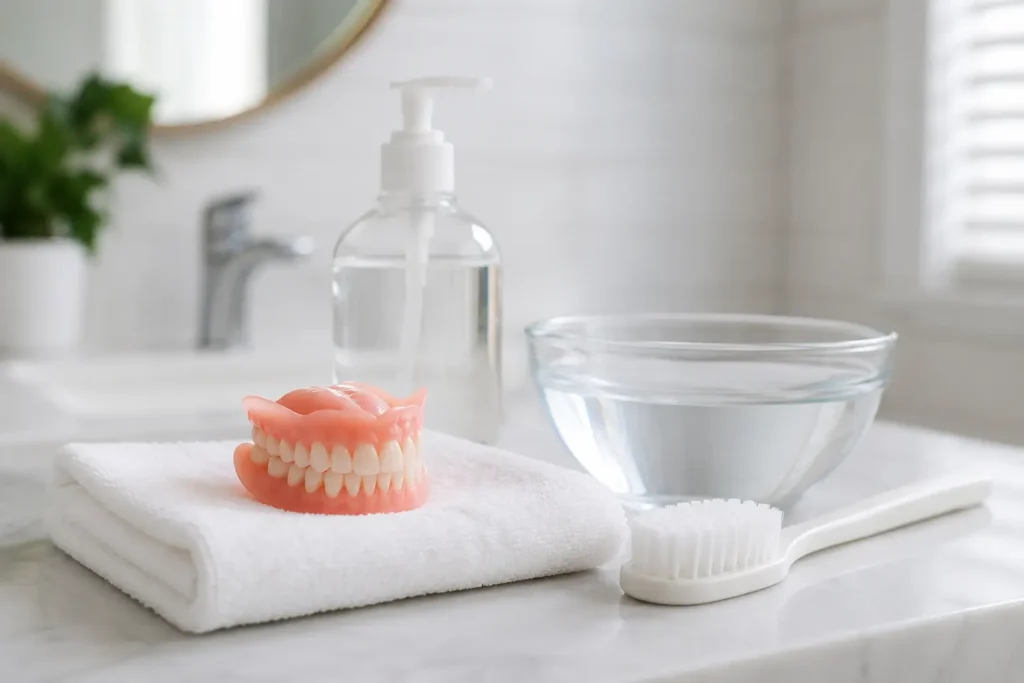
I approach denture cleaning with one rule: start with the gentlest method that works. In most cases, that means lukewarm water, a soft denture brush, and mild hand soap or dishwashing liquid. The American Dental Association lists mild hand soap or dishwashing liquid as cleaning options. However, it also warns against bleach and powdered household cleaners.
Your denture material matters too. Acrylic dentures, metal partials, flexible dentures, and soft liners may need different care. Therefore, never assume that one homemade soak suits every denture.
This guide explains how to clean dentures safely. It also compares common household options and shows when a dentist should take over.
How to Clean Your Dentures
A safe home remedy for cleaning dentures starts with a good daily routine. Gentle brushing removes loose food, plaque, and surface residue before they become harder to manage. However, soaking alone does not replace brushing.
Follow these steps:
- Wash your hands.
- Place a folded towel in the sink, or add a little water.
- Remove the dentures carefully.
- Rinse them with lukewarm water.
- Apply mild hand soap, mild dishwashing liquid, or a nonabrasive denture cleanser.
- Brush every surface with a soft denture brush.
- Clean the grooves that rest against your gums.
- Rinse the dentures well before wearing them again.
- Remove leftover adhesive from denture grooves with the soft brush.
- Gently clean your gums, tongue, cheeks, and palate.
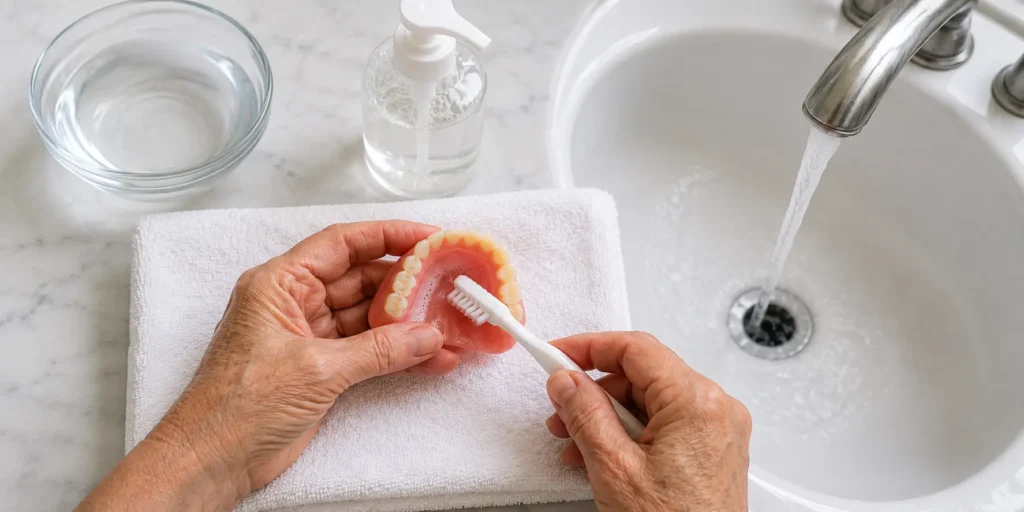
The towel protects the denture if it slips. Also, hold the base securely without forcing thin sections or metal clasps.
Never use hot or boiling water. Mayo Clinic warns that hot or boiling water can bend dentures out of shape. As a result, the denture may fit poorly.
Regular toothpaste can also cause problems. Many formulas are more abrasive than denture cleansers. Therefore, choose mild soap or a product made for dentures unless your dentist says otherwise.
For more detail, see our daily denture-cleaning guide. It covers brushes, storage, and oral hygiene.
1. Rinsing Right After Eating or Drinking
Rinsing after meals is a simple prevention step. It removes loose food and reduces the time that coffee, tea, or food pigments remain on the surface.
First, remove the dentures over a protected sink. Next, rinse them with lukewarm water. Then, check the inner surface for trapped food.
Rinsing helps, but it does not remove all plaque. Therefore, continue to brush the dentures at least once each day.
If food often collects under the denture, mention it at your next dental visit. The cause may be more than poor cleaning. For example, the fit may have changed.
When eating away from home, carry a clean denture case. This makes it easier to rinse safely and privately.
2. Soak Dentures in Denture Solution
Commercial denture solutions offer clear directions for soaking time and dilution. Therefore, they are often more predictable than a homemade mixture.
Before using one, read the label. Check whether the product suits:
- Full acrylic dentures
- Partial dentures with metal
- Flexible dentures
- Soft or resilient liners
- Dentures with recent repairs
Some products are not suitable for every material. Also, a longer soak does not always clean better.
After soaking, rinse the dentures thoroughly. Do not place them in your mouth while cleanser remains on the surface.
Commercial cleanser can be helpful when you want a label-directed process. Still, it does not remove the need for gentle brushing.
See our guide to cleaning partial dentures with metal clasps for more detail. Metal components need extra care because chlorine-based products may tarnish or damage them.
3. Soak Dentures in an At-Home Solution
Many readers want a home remedy for cleaning dentures that works overnight. However, there is no universal homemade soaking recipe.
Most dentures need to stay moist when they are out of the mouth. Also, remove them at night unless your dentist gives different instructions. Plain water may be suitable, but follow the directions for your material and cleanser.
Before using any homemade soak, ask these questions:
- Is the denture acrylic?
- Does it contain metal?
- Does it have a soft liner?
- Is it made from flexible material?
- Has it been repaired?
- Do you know the manufacturer’s cleaning directions?
If you do not know the material, use the gentlest routine. Clean with mild soap and lukewarm water. Then, ask a dentist before using vinegar, peroxide, or another soak.
That cautious approach may feel less exciting than a quick online recipe. However, it lowers the risk of discoloration, corrosion, surface changes, or poor fit.
Natural Denture Cleaning Solutions You Can Try
A natural home remedy for cleaning dentures is not automatically safe. Vinegar, baking soda, and lemon juice still have chemical or abrasive effects.
Therefore, match the method to the problem. Loose food needs rinsing. Soft plaque needs gentle brushing. Surface stains may need a suitable cleanser. Hardened tartar often needs professional removal.
The table below compares the main options discussed in the earlier research.
| Cleaning option | Possible role | Main caution |
|---|---|---|
| Mild hand soap or dishwashing liquid | Routine daily cleaning | Use a mild product and rinse thoroughly |
| Plain water | Keeping many dentures moist during storage | Follow material-specific storage advice |
| White vinegar | Commonly suggested for deposits or stains | Acid may be unsuitable for metal or some liners |
| Baking soda | Commonly suggested for surface residue | Hard scrubbing can scratch the surface |
| Hydrogen peroxide | Often promoted for stain removal | No universal home formula suits every material |
| Commercial denture cleanser | Label-directed soaking | Check compatibility with metal and liners |
| Household bleach | Not a general home-cleaning option | It can weaken, discolor, or damage dentures |
Mild soap is the clearest household option in American Dental Association guidance. Apply a small amount to a soft brush. Then, clean gently and rinse well.
Vinegar appears often in home-remedy advice. Earlier research found laboratory evidence of antimicrobial activity. However, laboratory findings do not establish a safe daily recipe for every denture. Acid can also be a concern for metal components.
Hydrogen peroxide also appears in stain-removal tips. Yet the earlier research did not establish one universal concentration or soaking time. Therefore, this article does not recommend an improvised peroxide soak.
Mouthwash is not a complete denture cleanser. In addition, formulas can contain alcohol, coloring, or other ingredients. Use it only when the denture manufacturer or dentist approves it.
The best home remedy for cleaning dentures is not the strongest mixture. Instead, it is the least aggressive method that solves the actual problem.
See our guide to removing stains from dentures for coffee, tea, and tobacco discoloration. Our denture-odor guide can also explain how to clean the mouth and storage case.
Baking Soda Paste for Gentle Cleaning
Baking soda is cheap and widely available. Consequently, many denture wearers try it before checking their denture material.
Still, the earlier research did not support baking soda as a universal daily cleanser. A thick paste and forceful brushing may scratch some denture surfaces.
Scratches can hold more stain and biofilm. Therefore, do not scrub one spot repeatedly.
If your dentist or manufacturer approves baking soda, use light pressure and a soft brush. Also, stop if the surface becomes rough or changes appearance.
Do not mix baking soda with vinegar simply because the mixture fizzes. The visible reaction does not prove better cleaning. Moreover, combining products makes the result harder to control.
Baking soda will not reliably remove hardened tartar. If a rough deposit does not brush away, do not scrape it with a sharp tool. Professional cleaning is safer.
Home Remedy for Cleaning Dentures: Safety Warnings
A home remedy for cleaning dentures should never place the denture or your health at risk. Unfortunately, stronger household products can cause permanent damage.
Avoid these products and methods:
- Hot or boiling water
- Abrasive or whitening toothpaste
- Stiff-bristled brushes
- Powdered household cleaners
- Household bleach
- Undiluted household chemicals
- Microwave or dishwasher cleaning
- Sharp tools used for scraping
- Soaking beyond label directions
- Mixing two or more cleaners
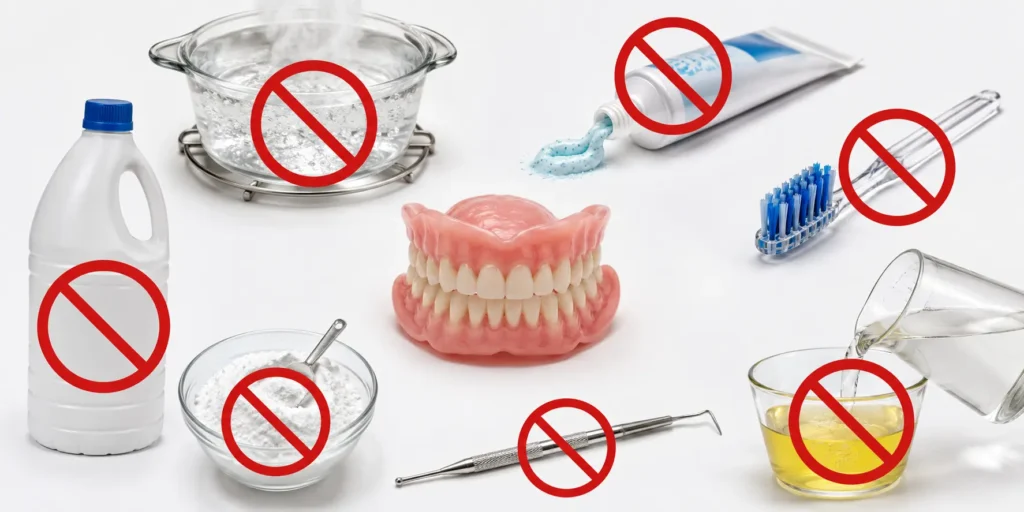
Mayo Clinic advises against hot water, bleach products, and abrasive cleaners. The American Dental Association also warns that bleach and powdered household cleansers may damage dentures.
Never mix bleach with vinegar, lemon juice, ammonia, or another cleaner. U.S. Poison Control explains that bleach mixed with an acid can release chlorine gas. Bleach mixed with ammonia can create chloramine gas.
Also, do not confuse household bleach with a formulated denture product. A labeled cleanser has controlled ingredients and directions. Household bleach does not provide the same safeguards.
When to See a Dentist
Some problems cannot be handled by a home remedy for cleaning dentures. Call a dentist when:
- Hard deposits do not brush away
- Odor returns soon after cleaning
- Stains remain after safe care
- The denture develops a crack or chip
- The surface feels rough
- A soft liner peels or hardens
- The fit becomes loose or painful
- You develop sores, redness, burning, or white patches
- You cannot identify the denture material
Redness, burning, or white patches can have several causes. Denture stomatitis and oral thrush are two possibilities. Therefore, avoid self-diagnosis and arrange an oral examination.
Professional cleaning is not a failure. In fact, it can remove hardened deposits without aggressive scraping. A dentist can also check fit, repairs, and the tissues under the denture.
Conclusion
When I evaluate a home remedy for cleaning dentures, I always start with the lowest-risk method. For most routine cleaning, mild soap, lukewarm water, and a soft denture brush provide a sensible starting point.
However, stains, soft plaque, odor, adhesive residue, and hardened tartar are different problems. They should not all receive the same treatment. Your denture material also changes what is safe.
Therefore, do not experiment when you cannot identify the material. Avoid hot water, abrasive toothpaste, household bleach, and mixed chemicals.
My practical takeaway is clear. Build a gentle daily routine, rinse well, and stop when a deposit will not brush away. A dentist can solve the difficult problems without risking damage to an appliance you depend on every day.
Frequently Asked Questions
What is the safest home remedy for cleaning dentures?
For routine care, use lukewarm water, a soft denture brush, and mild hand soap or dishwashing liquid. Rinse the dentures thoroughly before placing them back in your mouth.
Can I soak dentures in vinegar overnight?
Do not assume an overnight vinegar soak is safe. Vinegar may be unsuitable for metal components, soft liners, or other materials, so check with your dentist first.
Can I clean dentures with baking soda?
Baking soda is commonly suggested, but it is not a universal recommendation. If your dentist approves it, use a soft brush and very light pressure.
Can I use regular toothpaste on dentures?
Regular toothpaste may be too abrasive for acrylic dentures. Instead, use mild soap or a nonabrasive cleanser made for dentures.
Can I use dish soap to clean dentures?
Yes, the American Dental Association lists mild dishwashing liquid as a cleaning option. Use a small amount, brush gently, and rinse very wel
Can hydrogen peroxide whiten dentures?
Hydrogen peroxide appears in many home remedies, but no single homemade formula suits every denture. Ask your dentist before using it as a soak.
How do I remove tartar from dentures at home?
Do not scrape tartar with a knife, pin, or metal tool. If gentle brushing does not remove the deposit, arrange professional cleaning.
How do I stop dentures from smelling?
Clean the denture, your mouth, and the storage container every day. If odor returns quickly, ask a dentist to check for buildup, infection, or fit problems.
Should dentures stay in water overnight
Many dentures should stay moist while out of the mouth. However, follow the instructions for your material, liner, and cleaning product.
How often should I clean dentures?
Rinse after meals when practical. In addition, brush the dentures every day and follow the recommended soaking directions.

Muhammad Muaz
Muhammad Muaz shares practical cleaning, home care, improvement and everyday living guides for Urban Home Guide readers.
Related Home Guides