
Cleaning Silver at Home: Safe Methods for Every Type of Silver
Cleaning silver at home can feel risky. You may see black tarnish, cloudy patches, or yellow areas and worry that the item is ruined. You may also find conflicting advice…
Cleaning silver at home can feel risky. You may see black tarnish, cloudy patches, or yellow areas and worry that the item is ruined. You may also find conflicting advice online. One guide says to use baking soda and foil. Another suggests vinegar, toothpaste, or boiling water. The problem is that a method that works on plain sterling silver may scratch silver plate, loosen a gemstone, remove antique patina, or trap water inside a hollow handle. Many people do not know whether their item is sterling, plated, antique, weighted, or intentionally oxidized. That uncertainty makes even a simple cleaning job stressful.
In my experience researching and comparing household silver-cleaning methods, the safest results come from identifying the item before choosing a cleaner. I reviewed popular home remedies alongside guidance from jewelers, gemstone experts, and professional conservation sources. The same lesson appeared again and again: start gently and avoid treating every silver object the same way. This guide will help you identify your silver, choose a method that suits it, avoid common cleaning mistakes, and know when professional care is the safer choice.
What Is the Safest Method for Cleaning Silver at Home?
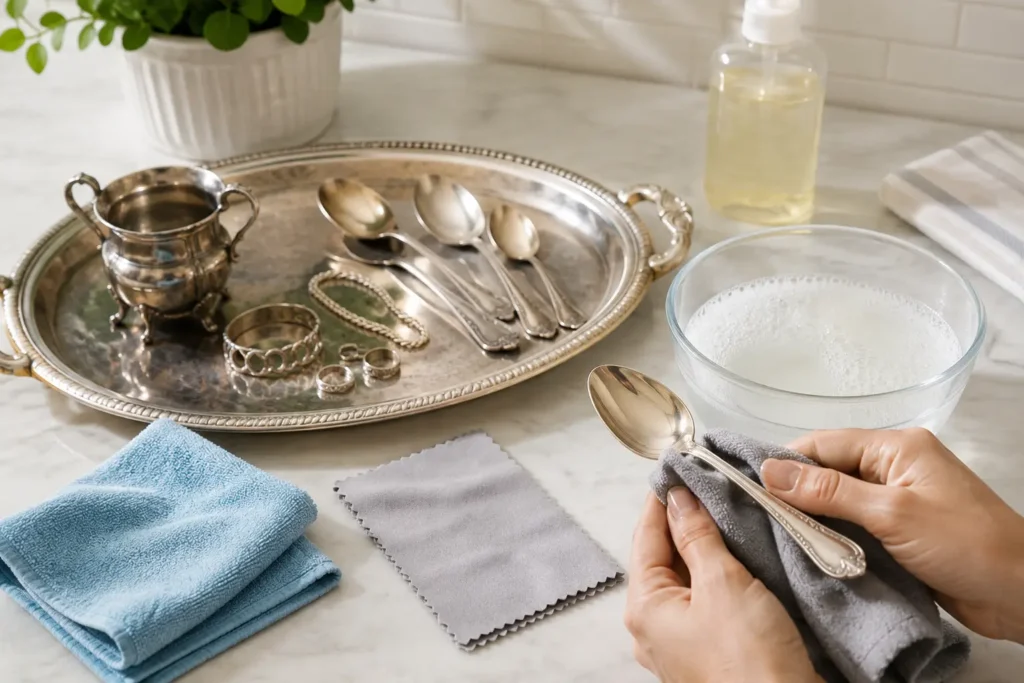
The safest starting method is warm water, mild dish soap, and a soft, lint-free cloth.
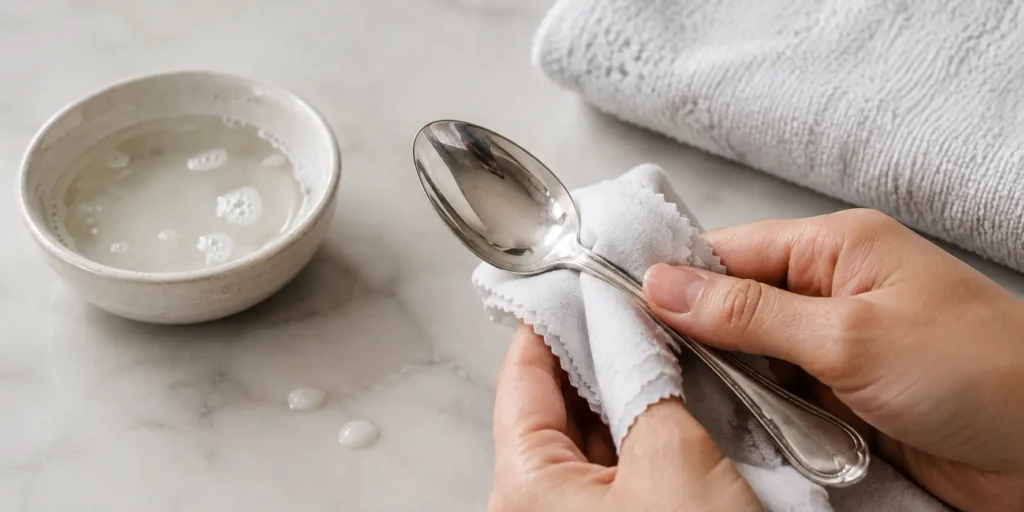
This method removes:
- Dust
- Skin oil
- Grease
- Fingerprints
- Food residue
- Light surface dirt
It does not normally remove true silver tarnish.
Wash the silver gently. Rinse it well. Then dry it at once.
Do not soak the object before checking it. Water can enter hollow handles, weighted bases, old joints, and small cracks. Once inside, it may be hard to remove. Conservation guidance advises against full immersion for hollow and mixed-material objects.
Use a silver polishing cloth when light tarnish remains. Use a silver-specific polish for heavier tarnish only when the product is safe for the object.
Quick Answer: Choose a Method by Silver Type
Use this table before cleaning.
| Silver Item | Safest Starting Method | Avoid or Use with Great Care |
|---|---|---|
| Plain sterling silver | Mild soap and a soft cloth | Hard scrubbing |
| Lightly tarnished sterling silver | Silver polishing cloth | Rough paste |
| Heavily tarnished plain sterling | Silver-specific polish | Long or repeated soaking |
| Silver-plated object | Gentle surface cleaning | Abrasive paste |
| Silver flatware | Handwashing and immediate drying | Long soaking |
| Antique or heirloom silver | Professional assessment | Removing all patina |
| Oxidized silver | Dry, clean cloth | Silver polish |
| Pearl-set jewelry | Pearl-safe gentle cleaning | Foil baths and heat |
| Jewelry with soft stones | Material-specific care | Boiling and strong chemicals |
| Hollow or weighted silver | Damp-cloth surface cleaning | Full immersion |
| Worn silver plate | Professional advice | Repeated polishing |
Oxidized silver has dark areas that were added on purpose. These dark details may be removed by strong polishing. Tiffany recommends using only a dry, clean cloth on oxidized silver and cleaning it only when needed.
Why Does Silver Tarnish?
Silver tarnish is a thin layer that forms on the metal. It may appear yellow, brown, gray, blue-black, or black.
Tarnish is not ordinary dirt.
It forms when silver reacts with sulfur compounds in the air. This creates a dark surface layer called silver sulfide.
Several things may speed up tarnishing:
- Humid air
- Salt air
- Skin oils and sweat
- Perfume
- Body lotion
- Hairspray
- Chlorine
- Household bleach
- Rubber
- Sulfur-containing paper
- Open-air storage
Tiffany notes that salty air, chlorine, sulfur, humidity, sweat, cosmetics, bleach, and other strong chemicals may cause sterling silver to tarnish. It also warns that sulfur in rubber can cause tarnishing and corrosion.
Tarnish does not always mean that the silver is ruined. In most cases, the change affects the surface.
However, every polishing session removes a small amount of metal. This matters most with silver-plated objects because the silver layer may be very thin. The Canadian Conservation Institute warns that any tarnish-removal method can damage silver plate.
Cleaning vs. Polishing vs. Tarnish Removal
These terms have different meanings.
Cleaning removes dirt, oil, food, and dust.
Tarnish removal removes or changes the dark silver-sulfide layer.
Polishing uses rubbing and often a mild abrasive to make the surface brighter.
An abrasive is a material that removes part of a surface through friction.
Silver polish, treated polishing cloths, and baking soda paste may all create some friction. Conservation guidance explains that polishes can leave fine scratch patterns and remove both tarnish and some silver.
Clean the item before polishing it. Dirt trapped under a cloth may scratch the surface.
Do not polish silver each time you use it. Tiffany states that polishing removes metal and should only be done a limited number of times during the life of a piece.
How to Identify Your Silver Before Cleaning It
Look for marks on the back, base, handle, clasp, or inside of the item.
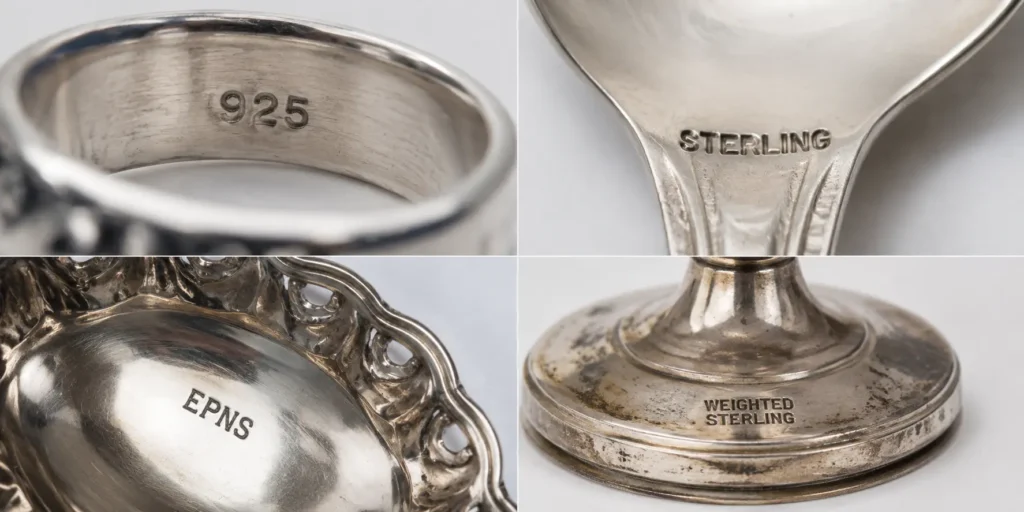
Common marks include:
- 925
- Sterling
- Sterling Silver
- Coin Silver
- Silver Plate
- Silver Plated
- EP
- EPNS
- Weighted Sterling
- A maker’s name or symbol
In the United States, “sterling,” “sterling silver,” and “925” describe silver that is at least 92.5% pure. Coin silver is 90% pure silver. Silver plate has a layer of silver over another metal.
A hallmark is helpful, but it may not tell the full story.
The item may have:
- Replaced parts
- Old repairs
- Worn plating
- Soldered joints
- A filled handle
- A weighted base
- Added stones
- Wood or felt parts
Check the item under bright light.
Look for copper, brass, or yellow metal showing through. This may mean that the silver plating has worn away.
Also check for loose stones, cracks, gaps, soft handles, and dark decorative areas.
Do not use a strong method when you cannot identify the item. Valuable or unknown pieces should be checked by a jeweler, silversmith, or metal conservator.
Using a Soft Cloth for Daily Maintenance
Daily maintenance does not mean polishing silver every day.
It means wiping away fingerprints, moisture, or light dirt after use.
Choose a clean microfiber cloth or a silver polishing cloth. Use light, straight strokes.
Do not press hard. Do not use a cloth that contains dirt or grit.
A treated silver cloth may turn black during use. This is often tarnish that has moved from the silver to the cloth.
Do not wash a treated cloth unless its maker says it can be washed. Washing may remove its cleaning treatment.
A soft cloth works well for:
- Silver rings
- Bracelets
- Chains
- Flatware
- Trays
- Serving pieces
- Napkin rings
- Oxidized silver
For daily jewelry care, wipe the item after wearing it. This removes sweat, lotion, and skin oil before storage.
5 Things in Your Kitchen That Will Clean Silver
Many home guides recommend kitchen products for cleaning silver. Some are useful. Others may create more risk than benefit.
| Kitchen Method | What It May Do | Main Concern |
|---|---|---|
| Dish soap and warm water | Removes dirt and oil | Water may enter hollow parts |
| Baking soda paste | Removes some tarnish through rubbing | May scratch the surface |
| Baking soda and foil | Changes tarnish through a reaction | May remove patina |
| Lemon-lime soda | May loosen some buildup | Acid, sugar, and residue |
| Vinegar and baking soda | Creates a bubbling reaction | Long soaking and material damage |
1. Dish Soap and Warm Water
Dish soap and warm water are the best first choice for most plain silver objects.
You will need:
- A small bowl
- Warm water
- Mild dish soap
- A soft cloth
- A clean towel
Add a few drops of soap to the water.
Place a plain, solid silver object in the water for a short time. Wipe it gently.
Rinse it with clean water. Then dry it at once.
Soap can make dull silver look brighter because it removes grime. However, it will not usually remove true tarnish.
Do not fully soak:
- Hollow silver
- Weighted candlesticks
- Knives with filled handles
- Old repaired objects
- Items with wood or felt
- Jewelry with glued stones
- Valuable antiques
For these pieces, dip the cloth into the soapy water. Wring it out well. Clean only the metal surface.
Handwashing is the safest general choice. Tiffany says most of its silver, except knives, may go through a dishwasher cleaning cycle if removed before drying. However, it still states that handwashing is better. Always follow the maker’s care instructions.
2. Baking Soda and Water
Baking soda can be mixed with water to make a paste.
This is a low-cost method. However, it requires rubbing. Baking soda may act as a mild abrasive.
Use it only on plain, low-value sterling silver after gentler cleaning has failed.
Do not use baking soda paste on:
- Silver plate
- Antiques
- Valuable objects
- Mirror-polished silver
- Oxidized silver
- Jewelry with stones
- Items with gilding
To make the paste:
- Place a small amount of baking soda in a bowl.
- Add water a few drops at a time.
- Mix until a soft paste forms.
- Test it on a hidden area.
- Apply it with very light pressure.
- Rinse away all residue.
- Dry the item at once.
Arm & Hammer recommends a baking soda paste and gives contact times from about 30 seconds to 10 minutes. Longer contact does not always mean a safer or better result.
Stop if you see scratches, a dull surface, or copper-colored metal.
A copper or brass color may mean that the silver layer is missing. Cleaning cannot replace lost plating.
3. Aluminum Foil
The aluminum foil method uses hot water, aluminum, and an electrolyte.
An electrolyte is a liquid that allows an electrical reaction to happen.
Household guides often use baking soda. The silver must touch the aluminum foil.
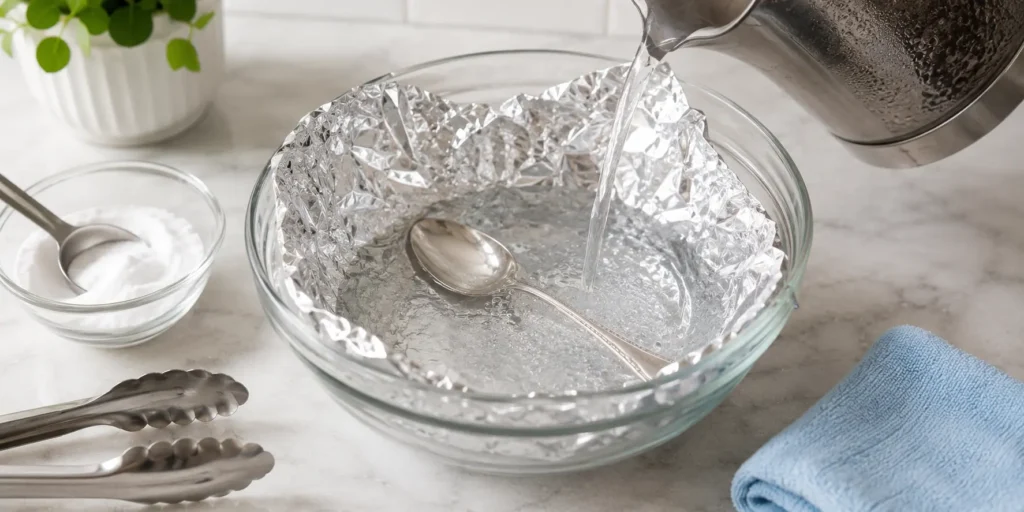
Arm & Hammer recommends hot water, foil, and two heaping tablespoons of baking soda for smaller pieces. The Guardian suggests about two tablespoons per liter of boiling water.
Conservation guidance describes a similar process using washing soda instead of baking soda. It warns that the method may leave a dull finish, cause pitting in some cases, or make the silver tarnish faster later.
Use the household foil method only for plain, solid, low-value sterling silver.
You will need:
- A heat-safe bowl
- Aluminum foil
- Hot water
- Baking soda
- Tongs
- A soft cloth
Line the bowl with foil. Place the silver on the foil. Make sure the two metals touch.
Add enough hot water to cover the item.
Add about two tablespoons of baking soda for each liter, or about one quart, of water.
Wait a few minutes. Check the item often.
Remove it as soon as the tarnish improves. Rinse it very well. Then dry it at once.
Do not use the foil method on:
- Antique silver
- Valuable patina
- Oxidized silver
- Worn silver plate
- Pearls
- Opals
- Turquoise
- Coral
- Amber
- Enamel
- Glued stones
- Hollow objects
- Weighted objects
- Unknown items
4. Lemon-Lime Soda
Some household guides recommend soaking sterling silver in lemon-lime soda. HowStuffWorks includes this as a cleaning method.
However, soda is not a preferred silver cleaner.
It contains acid, sugar, flavoring, and other ingredients. These may leave a sticky film.
A long soak may also affect:
- Glue
- Enamel
- Pearls
- Soft stones
- Plated metal
- Mixed materials
Use warm water and dish soap instead.
If soda has already been used, rinse the silver well. Wash away any sticky film with mild soap. Then dry the item.
5. White Vinegar and Baking Soda
HowStuffWorks also recommends a vinegar-and-baking-soda soak.
This method needs caution.
Vinegar and baking soda react and create bubbles. The bubbles do not prove that tarnish is being removed safely.
Long soaking may affect:
- Thin silver plate
- Old solder
- Adhesives
- Soft stones
- Inlays
- Hollow parts
- Repaired areas
- Dark decorative finishes
Do not use this mixture on antique or valuable silver.
Use mild soap for dirt. Use a suitable silver cloth or silver polish for tarnish.
4 Ways to Clean Silver With Baking Soda
Arm & Hammer presents four main baking soda methods:
- Baking soda paste
- Hot water, foil, and baking soda
- Boiling with foil, salt, and baking soda
- Wrapping large items in foil and soaking them
These methods are not equally safe.
Method #1: Use a Baking Soda Paste to Polish Silver
This method removes tarnish through rubbing.
It may suit plain sterling silver with little value. However, it can scratch a polished surface or wear thin silver plate.
Use a small amount. Test it first. Rinse it well.
Method #2: Clean Silver in Baking Soda, Hot Water and Aluminum Foil
This method removes tarnish with less rubbing.
The silver must touch the foil. However, the process may remove desired patina or leave a dull finish.
Use it only on plain silver that is safe to submerge.
Method #3: Boil Silver in Baking Soda, Salt and Foil
Arm & Hammer suggests boiling some silver pieces for about four minutes.
High heat adds more risk.
Do not boil:
- Gemstone jewelry
- Pearls
- Opals
- Glued settings
- Antique silver
- Hollow objects
- Weighted pieces
- Enamel
- Repaired objects
GIA warns that heat and sudden temperature changes may damage some gems. Pearls may dry out and crack. Opals may change color or develop small cracks.
A hot-water method gives you more control than boiling.
Method #4: Wrap Large Silver Items in Aluminum Foil and Soak
Arm & Hammer recommends wrapping large objects in foil and soaking them with hot water and baking soda.
Do not assume that a large object is safe to soak.
A coffee pot may have a hollow handle. A candlestick may have a filled base. A trophy may have hollow feet.
Water may enter through small gaps. Conservation guidance warns that cleaning liquid trapped inside hollow objects can be very difficult to remove.
How to Polish Silver in a Few Minutes: The Green Way
The Guardian presents baking soda and foil as a quick alternative to regular silver polish. It uses boiling water and about two tablespoons of baking soda per liter.
This method may reduce the need for disposable wipes or strong-smelling polish.
However, “natural” does not mean safe for every object.
The method still uses:
- Heated water
- Aluminum foil
- Baking soda
- A chemical reaction
It may also change the finish or remove desired patina.
The lowest-waste approach is often prevention.
Wipe silver after use. Store it well. Remove light tarnish before it becomes thick.
A reusable polishing cloth may create less waste than repeated use of foil, hot water, and disposable materials.
Quick Polishing With the Toothpaste Method
Toothpaste is often promoted as a quick homemade polish. HowStuffWorks includes it as a silver-cleaning method.
However, toothpaste is made for teeth, not silver.
Formulas differ. Many contain abrasive particles. Whitening toothpaste may be more abrasive.
Toothpaste may:
- Leave fine scratches
- Dull the finish
- Wear through silver plate
- Collect in small designs
- Leave a cloudy film
Do not use toothpaste on valuable, antique, plated, or highly polished silver.
A proper silver polishing cloth is safer.
Professional Silver Cleaner for Precious Metal Care
Commercial silver products include:
- Creams
- Foams
- Wipes
- Polishing cloths
- Liquid dips
Choose a product made for your type of silver.
Read the full label. Check whether it is safe for silver plate, jewelry, stones, enamel, or oxidized finishes.
Test it on a hidden area.
Use the shortest contact time on the label.
Avoid general metal polish. Conservation guidance states that general metal polishes may be more abrasive than silver polish and can remove more silver.
Liquid dips need extra care. They can enter hollow spaces and become hard to rinse out. They may also leave yellow discoloration or cause pitting when silver is exposed for too long.
Use professional help when:
- The item is valuable
- It is antique
- Plating is worn
- Stones are loose
- The object is hollow
- The surface has deep pits
- Several materials are present
- You do not know what the object is
A jeweler can help with modern jewelry. A silver restorer or metal conservator may be better for historic pieces.
How to Clean Sterling Silver Jewelry
Sterling silver jewelry often becomes dark because it touches skin, sweat, lotion, perfume, and air.
Begin with mild soap and warm water.
Place plain sterling silver jewelry in the water for a short time. Wipe it with a soft cloth. Rinse it well. Then dry it.
Use a silver polishing cloth for light tarnish.
Pay special attention to:
- Clasps
- Chain links
- Ring settings
- The inside of bracelets
- Areas that touch skin
Do not pull thin chains while cleaning them.
Remove silver jewelry before swimming, showering, using household cleaners, applying lotion, or spraying perfume. Chemicals may damage silver and delicate stones.
Store each piece separately to prevent scratches and tangled chains.
How to Clean Silver-Plated Items Safely
Silver-plated items have a thin layer of silver over another metal.
This layer may wear away over time.
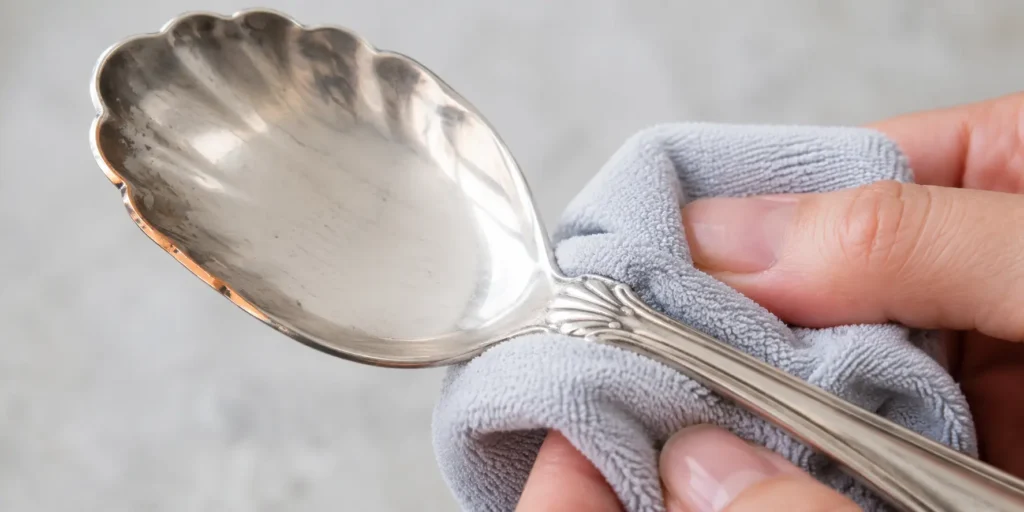
Start with warm water, mild soap, and a soft cloth. Use a damp cloth instead of soaking the item when it has hollow parts or mixed materials.
Dry it at once.
Use very little pressure if you need a polishing cloth.
Stop if you see:
- Copper color
- Brass color
- Yellow patches
- Uneven surface color
- Dark base metal
Raised patterns, edges, handles, and corners often wear first because they receive the most contact.
Do not scrub an area where the base metal is already visible. Cleaning cannot replace silver that has worn away.
Professional replating may be needed.
How to Clean Silverware and Flatware Before an Event
Silverware is often cleaned before holidays, dinners, weddings, or family events.
When time is short, do not begin with the strongest method.
Use this quick routine:
- Separate knives from forks and spoons.
- Check for filled handles or loose parts.
- Wash with warm, soapy water.
- Rinse each piece.
- Dry at once.
- Use a silver cloth only where tarnish remains.
- Stop when the item looks clean enough.
Do not leave silverware soaking in a sink.
Silver knives may have filled or joined handles. They need more care than plain forks and spoons.
Tiffany says it is better to wash silver flatware by hand in hot, soapy water after use. It also advises immediate rinsing and drying.
For a large set, clean a few pieces at a time. This stops water from drying on the surface.
How to Clean Silver Jewelry With Gemstones
A method may be safe for silver but unsafe for the stone.
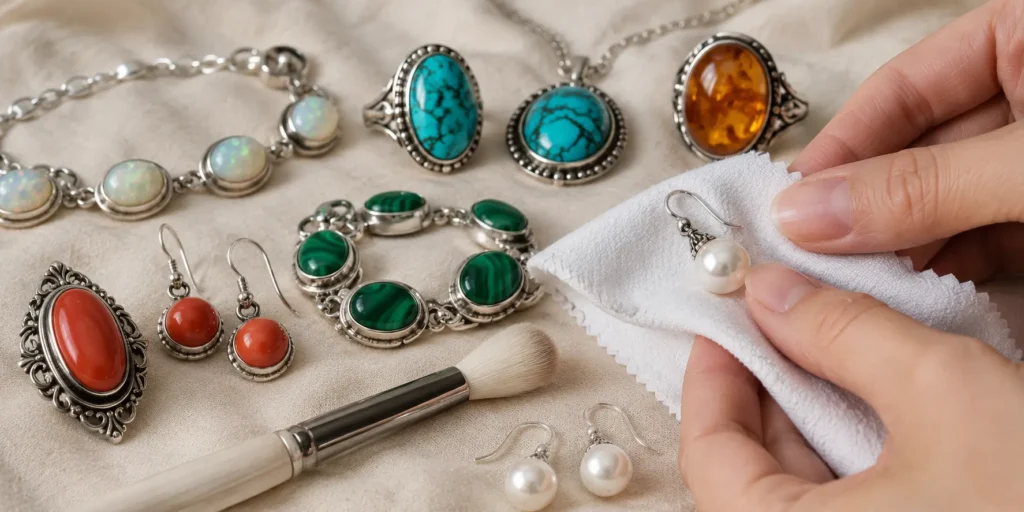
Warm water and mild soap may be safe for many strong, untreated gems. However, soft, porous, filled, coated, organic, or heat-sensitive materials need special care.
Avoid foil baths, boiling, harsh dips, steam, and ultrasonic cleaners when the jewelry contains:
- Pearls
- Opals
- Turquoise
- Coral
- Amber
- Malachite
- Lapis lazuli
- Treated gems
- Filled stones
- Glued stones
GIA warns that heat, chemicals, solvents, steam, and ultrasonic cleaning can damage some gems and treatments. It also notes that cosmetics may permanently damage pearls and other delicate or porous gems.
For pearl earrings, GIA suggests warm, soapy water and a new, soft makeup brush. Pearl strands should dry flat because wet thread can stretch.
When you cannot identify the stone, use a slightly damp, soft cloth. Then ask a qualified jeweler for advice.
Should You Clean Antique or Heirloom Silver?
Do not treat antique silver like ordinary modern silver.
A dark area may be:
- Tarnish
- Desired patina
- An oxidized design
- Old repair material
- Exposed base metal
- Part of the original finish
Heavy polishing may remove detail and change the appearance.
Inspect the hallmark, construction, surface, and repairs before cleaning.
Do not soak an antique when it has:
- Wood
- Bone
- Felt
- Old solder
- Hollow sections
- Filled bases
- Gilded areas
- Enamel
- Inlays
Conservation guidance advises examining hallmarks, solder joints, hollow parts, gilding, and inlays before choosing a cleaning method.
For valuable heirlooms, professional advice is safer than a strong home treatment.
How to Clean Silver Fast Without Causing Damage
You may need quick results before a party or special event.
The fastest safe method is not always the strongest method.
For plain silver:
- Wash it with mild soap.
- Rinse it well.
- Dry it fully.
- Use a silver polishing cloth on visible tarnish.
- Polish only the areas guests will see.
- Stop when the result is acceptable.
This method is safer than rushing into boiling, vinegar, toothpaste, or long soaking.
Do not use a new method for the first time on a valuable item just before an event.
If you have only a few minutes, focus on cleanliness and a neat finish. Do not try to remove every dark mark.
Low-Cost Silver Cleaning Without Special Products
Budget-conscious readers often want to use items already at home.
The safest low-cost kit includes:
- Mild dish soap
- Warm water
- A soft microfiber cloth
- Cotton swabs
- A clean towel
This basic kit removes most dirt and oil.
A reusable silver polishing cloth is often a better long-term purchase than using many harsh household mixtures.
Do not choose a method only because it is cheap. Damage to silver plate, stones, or an antique may cost much more to repair.
Common Silver-Cleaning Problems and How to Fix Them
Why is my silver still black?
The dark area may be thick tarnish. It may also be intentional patina, worn plating, or another finish.
Do not keep scrubbing until you know the cause.
Why did my silver become dull?
The cleaner may have scratched the finish. An electrochemical process may also leave rough silver particles that create a dull surface.
A gentle silver polishing cloth may improve it.
Why is white residue left in the design?
Baking soda or dried polish may remain in small details.
Rinse the item again when it is safe. Use a soft, damp brush or cotton swab.
Do not use a metal tool.
Why can I see copper or brass?
The silver plating may be worn away.
Stop polishing. Cleaning cannot replace the missing layer.
Why did the dark details disappear?
The item may have had an oxidized finish or valuable patina.
Strong polishing or a foil bath may have removed it. Tiffany warns that over-cleaning can remove an oxidized finish.
Why did the foil method fail?
The silver may not have touched the aluminum.
The mark may also be dirt, worn plating, paint, coating, or a finish other than silver tarnish.
Do not repeat the process many times.
Why did the silver tarnish again quickly?
Humidity, sulfur, cosmetics, chlorine, rubber, and open-air storage may speed up tarnishing.
Silver treated by electrochemical reduction may also tarnish faster than polished silver.
Why does the silver smell after cleaning?
A sulfur-like smell may occur during a foil treatment.
Rinse the item well. Dry it fully. Air out the room.
Stop if the smell comes from a hollow object that may contain trapped liquid.
What should I do if a stone becomes loose?
Stop cleaning.
Do not wear the item. Keep it in a small padded box and take it to a jeweler.
What should I do if water entered a hollow handle?
Stop the cleaning process.
Place the item in a dry, well-ventilated area. Do not use high heat.
Ask a restorer for help when the object is valuable or when cleaner may remain inside.
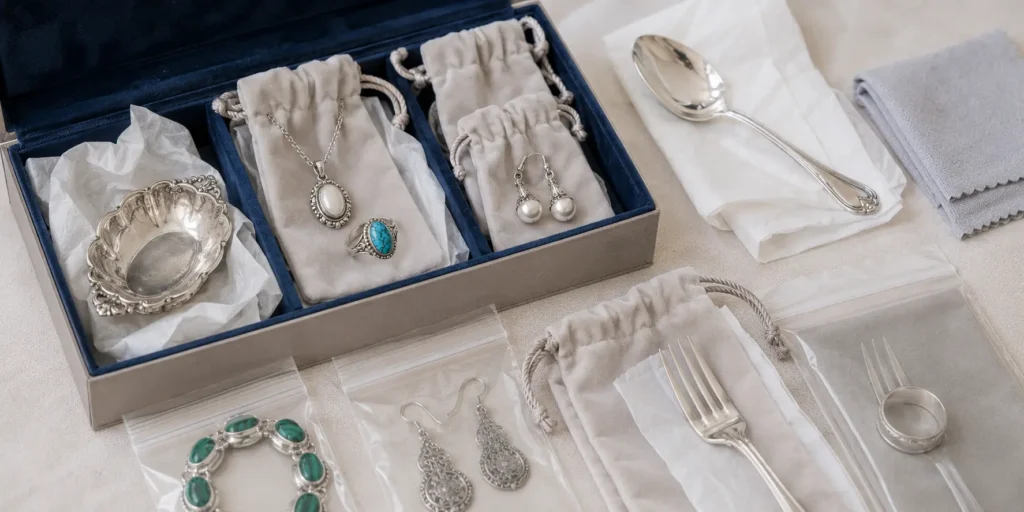
Properly Storing Silver to Prevent Tarnish
Clean and dry silver before storing it.
Keep separate pieces apart to prevent scratches.
Useful storage materials include:
- Anti-tarnish cloth
- Acid-free, sulfur-free tissue
- Individual soft pouches
- A lined silver box
- Suitable sealed bags for plain silver objects
The Canadian Conservation Institute recommends suitable polyethylene bags, acid-free tissue, silica gel, activated charcoal, and tarnish-resistant materials for appropriate silver objects.
However, storage must suit every material in the piece.
Pearls and opals need some moisture from the air. GIA warns that very dry storage may harm them.
Keep silver away from:
- Rubber bands
- Damp bathrooms
- Chlorine
- Bleach
- Perfume
- Lotion
- Hairspray
- Household chemicals
- Sulfur-containing paper
- Direct contact with other jewelry
Check stored silver every few months. Light tarnish is easier to manage than a thick black layer.
Conclusion
After reviewing common household methods and professional silver-care guidance, my strongest advice is to use the least aggressive method that provides a good result. Start with mild dish soap, warm water, and a soft cloth. Use a silver polishing cloth or a suitable silver cleaner only when stubborn tarnish remains.
Baking soda and aluminum foil may work on plain sterling silver, but they are not safe for every item. Silver-plated objects, antiques, pearls, gemstones, glued settings, oxidized finishes, and hollow pieces require extra care. Most serious damage occurs when people apply too much pressure, soak an unknown item, or repeatedly use a strong cleaning method after the first attempt fails. Always check the hallmark, inspect the item’s construction, test the method on a hidden area, and stop once the silver looks clean enough. Gentle cleaning and proper storage will protect the surface better than frequent polishing.
FAQs
What is the safest way to clean silver at home?
Use warm water, mild dish soap, and a soft cloth. Rinse the item well and dry it at once. Use a silver polishing cloth only when light tarnish remains.
What is the best homemade silver cleaner?
Mild dish soap and warm water are the safest homemade starting solution. They remove dirt and oil. True tarnish may need a silver polishing cloth or suitable silver polish.
Can baking soda damage silver?
Yes. Baking soda paste may act as an abrasive. It can scratch polished silver or wear through thin plating.
Does aluminum foil really clean silver?
Yes. A reaction can occur when silver touches aluminum in a suitable warm solution. However, the treatment may leave a dull finish and is not safe for all objects.
Is baking soda safe for sterling silver?
It may be used carefully on plain, low-value sterling silver. Do not use it on stones, glue, oxidized finishes, antiques, or hollow pieces.
Can I clean silver without baking soda?
Yes. Start with mild dish soap. Use a silver polishing cloth for light tarnish. Use a suitable silver polish when more cleaning is needed.
Can I clean silver without aluminum foil?
Yes. Warm, soapy water removes grime. A silver cloth or silver-specific cream can remove tarnish without foil.
Is toothpaste safe for silver?
Toothpaste is not recommended. Its abrasives may scratch the surface, dull the finish, or damage silver plate.
Can vinegar damage silver?
Vinegar may affect plating, solder, adhesives, stones, and mixed materials. It is not the safest general silver-cleaning method.
How do I clean badly tarnished silver?
First remove dirt with mild soap. Then use a silver polishing cloth or a suitable silver polish. Take valuable, antique, plated, or damaged items to a professional.
Can I clean silver-plated objects at home?
Yes, but use gentle cleaning. Start with mild soap and a soft cloth. Avoid strong rubbing and rough paste.
Can I use the foil method on silver plate?
Use great caution. Tarnish removal can damage thin or worn plating. Avoid the method on old, valuable, or worn plated pieces.
How do I clean silver jewelry with stones?
Use a method that is safe for both the silver and the stone. When you do not know the gem or treatment, use a damp cloth and ask a jeweler.
Why did my silver turn dull after cleaning?
The surface may have been scratched or left with rough silver particles. Stop using the method. A gentle silver cloth may improve the finish.
Why is my silver still black?
The dark area may be heavy tarnish, intentional patina, exposed base metal, or damaged plating.
Can silver go in the dishwasher?
Handwashing is the safest general choice. Some makers allow certain silver flatware in a dishwasher under strict conditions. Knives, antiques, plated pieces, and mixed-material items need more care.
How often should silver be polished?
Polish only when needed. Every polishing session removes some metal. Good storage reduces the need for frequent polishing.
How can I keep silver from tarnishing?
Keep it clean and dry. Store it away from humidity, rubber, sulfur, chlorine, cosmetics, and household chemicals.
When should I take silver to a professional?
Seek help for antiques, valuable pieces, worn plating, loose stones, hollow objects, deep pitting, and unknown materials.

Muhammad Muaz
Muhammad Muaz shares practical cleaning, home care, improvement and everyday living guides for Urban Home Guide readers.
Related Home Guides